Thursday, October 28, 2010

Lego Star Wars Hoth Rebel Trooper

Lego Star Wars Hoth Rebel Trooper. Say that three times fast. Now try and build it for Halloween. Not so easy, is it? If you have to ask what a Hoth Rebel Trooper is then you're not my friend.


Christian and I had a blast building this costume. Okay, I mostly built it and he ran circles in the garage. Here's a pic of the real thing.


Not only do they look similar, Christian moves about as easy as the real minifig - you have to pick him up and place him where you want him.


It's hard to imagine a seven year old running around all Hallow's Eve in such a restrictive costume so Heather made a second matching soft version which goes underneath the foam version. Yeah, Heather's cool like that. I'll debut it tomorrow.


And compare that face to the minifig. The eyes, the smile - we tried to make a perfect replica but Christian is, hands down, more handsome than the original.


And the gun? Remember, you can see how I molded that from a silicon mold in black acrylic plastic here. http://nelsonsinspace.blogspot.com/2010/05/blog-post.html

Wednesday, October 27, 2010

Halloween Fast Approaching

Crunch time. Christian's costume is nearly complete. I offered to make Erika any costume she wanted and she said "Leopard." We already have a Leopard costume so instead of working until midnight on another elaborate costume I breathed an imperceptible sigh of relief. As for Juliet, well she's almost two and we have half a dozen costumes that will fit her. Care to guess what I'm making for Christian?


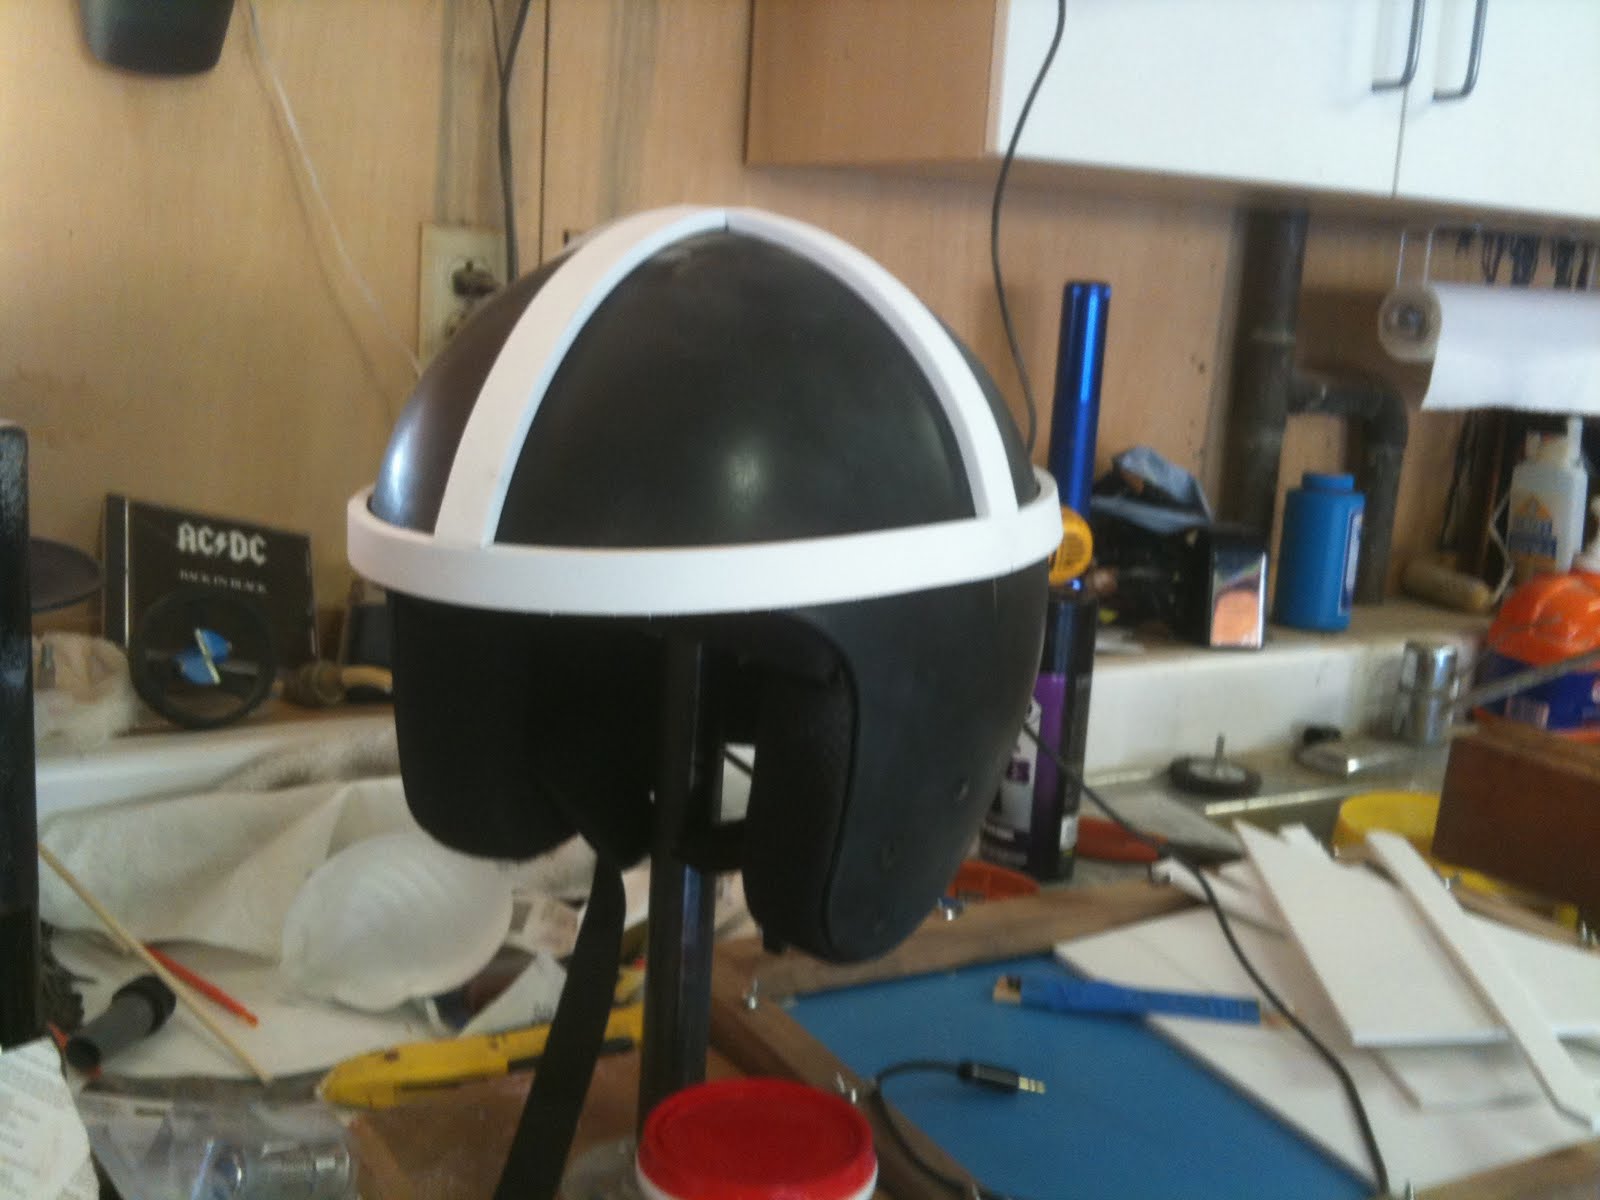
I found a child's motorcycle helmet for a couple dollars at a second hand store and applied some foam strips to it. The foam is easy to work with but its not easy to paint. I thought I would flood the foam with several coats of primer, sand it, and paint it, but it was a lot more work than I anticipated. Next time I'll use Apoxie Sculpt because its pliable, dries hard, and is easier to paint.


The backpack is made from foam flooring I purchased from Costco. I hardened the backpack by applying some fiberglass resin because I expect Christian will play with it long after Halloween. Another lesson learned? - I thought the resin would be enough but next time I'll throw a little fiberglass cloth in to strengthen it.

Here's a leg. You can see I turned the diamond plate pattern inward and used the smooth bottom of the flooring for the exterior. Straight cuts are easily made with a bandsaw. I also made a jig to hold a razor blade on a perfect 45 degree angle and cut the corners where the pieces joined. Gorilla brand instant glue worked best for joining the pieces. I later reinforced the corners with thing foam and a more glue. No resin on the exterior - I want it to remain flexible so he can walk.


First coat of primer. I brushed on primer to the boxy peices because I really wanted it to soak in. The backpack and helmet were sprayed. Stay tuned for the reveal!

Sunday, October 10, 2010

It's Almost Too Easy


Decorating for Halloween is almost too easy. I could cover every wall, ceiling and floor with the ideas that haunt my head every October. When I was in the second grade I was blessed to live in LaVerne. Not just any house in LaVerne. I lived in the house where the bookmobile parked each week during summertime. I remember walking out our front door, across the crab grass, sun cooking the top of my head, and then suddenly stepping up the stairs of the dark, air-conditioned mobile library.


I rotated through the same books week after week - Movie Monsters, The Legend of Loch Ness, and Dunninger's Encyclopedia of Magic. Few seven-year-olds knew as much as I did about Lon Chaney, Nessie, and Harry Blackstone, Sr. Consequently, my mind now gravitates to all things Halloween especially classic horror figures, urban legends, and mystery. I could easily spend more money on Halloween than Christmas but that would be lame.


So Heather and I edit our natural inclinations to surround ourselves in all things Halloween by following one rule - make it instead of buy it. This naturally limits our decorative ambitions because after working and raising three kids, there is so little time left to devote to Halloween projects (exactly 7 1/2 minutes a day). I spent a few hours working on the Skull display below. Here are three new projects made by Heather. I love her simple mod of our rabbit portraits - the Zorro masks; the bat sewed from a sock; and her delicious spiderweb cupcakes.


Sunday, October 3, 2010

Skull-y


I saw these little skulls at a Halloween store and bought a bag of them. I didn't know what I was going to do with them. I just knew I'd put them to use somehow.


I thought of stringing them or make a ball out of them, but they'd go unnoticed in those forms. A shadowbox would work best.


I wish I had a few weeknights to work on this but I only had couple hours this morning.


After gluing up the pins, I placed one skull dead center in the shadow box and thought "Argh, one head looks better than the whole bunch."


I had already committed to my arrangement so instead of creating high-art I settled on a nice Halloween arrangement.


Monday, September 6, 2010

Niederfrank's


Niederfrank's. The name alone makes you want to try this ice cream.


Mint and chip.

Peppermint.


Chocolate.


I shot these with my iPhone using the Hipstamatic app. Nice app for 99 cents. Note the date - SEP 80. Hipstamatic thought is would be cool to time stamp their pics 30 years ago. Clever and stupid at the same time. Much to my chagrin there's no way to go into the settings and make the date current. I've researched the issue online and apparently I'm not the only Hipstamatic user who is annoyed by the 30 year old date.

Sunday, September 5, 2010

LIfe Size Lego Star Wars Blaster

As some of you may know, I used to work for a prop shop manufacturing magic tricks/illusions for some big time magicians like Doug Henning and Siegfried & Roy. Granted, my main job was to sweep the floor but the boss, Les Smith, soon realized that I had some mechanical skills instilled by my father. My father, the dentist, never shied-away from tackling a difficult project from repairing teeth to customing the interior/exterior of the family van to rebuilding the engine of an MG Midget. Everyday after sweeping the floor I was put to work building props - sawing, soldering, grinding, polishing, and sewing - anything to complete the prop. Well, I've always been fascinated by one prop building technique that I never learned - molding and casting plastic resin.


Inspired by Harrison Krix, an amateur prop builder at http://www.volpinprops.blogspot.com/, I decided to try a relatively easy mold/cast job - a life size Lego Star Wars Blaster. Anyone with a boy under 10 knows how popular this item could be. After scouring the Internet I found that no one had attempted a life size version of the ubiquitous blaster. So why not me?


This was also an excellent project to turn on my new Jet mini lathe. I chose soft, finely grained basswood because it's easy to shape but in the future I might choose maple because basswood tears out whereas maple is easier to machine.


My template was simple - a blown up picture of an actual Lego blaster. I glued up the shaped pieces, applied some car body filler, and sanded the piece over and over.


Using alternating colors of primer I was able to sand, pinpoint any flaws, then fill and sand them out.


I wet-sanded the final black coat of primer to 1000 grit. Then I waxed the master with car wax. Heather was surprised by the smoothness of the master's exterior. It felt like plastic but it was just wood, filler, and paint. Next time I mold an item I'll take the grit even higher because the silicon picked up every minor scratch of the 1000 grit sand paper.


I built a simple mold box, filled it with clay, and embedded the master half way. The dots you see are simply registration keys so that the two halfs of the mold would mate well together.


I filled the mold with Mold Max silicone, nice and slow in the beginning to make certain that no bubbles formed on the surface which might come through in the casting. Then I filled the rest of the mold with more silicon.


After the silicone dried, I flipped the mold over and removed the clay. Leaving the master in the mold, I applied a "release agent" (a must) and then poured the second half of the mold with silicone. After the second half dried, I peeled the mold apart and took out the master. Using white plastic I "slush cast" the first copy. The white resin set up in about 10 minutes.


I bought some black resin which sets up very quickly and molded a black version. The black resin has a shorter "open time" and heats up quickly. My first black copies came out warped. Apparently, the heat initially expands the mold and, as it cools, it sucks the sides of the gun inward. I solved the problem by demolding the copies just after they hardened (still warm to the touch) and drilling a tiny air hole to allow the hot air to escape as it cooled. The pink copy is simply white resin with a little red dye.


Above is a pic of an original Star Wars Mini Fig (Clone Trooper) holding a blaster - tiny, huh? My life size copies usually come out with a little flashing attached. I trim it off with a razor blade and polish the plastic with an electric buffer and jewelry buffing compounds. Voila!


Tuesday, August 31, 2010